Big Flower Drawing Easy: A Simple and Fun Guide to Creating Stunning Floral Art
Big Flower Drawing Easy have always been a symbol of beauty, growth, and nature. One of the most popular ways to express these traits in art is through flower drawings. A Big Flower Drawing Easy approach makes it possible for anyone, whether you are a beginner or someone with a bit of experience, to create something stunning. Drawing flowers doesn’t have to be intimidating—sometimes the simplest approach results in the most impressive work.
In this guide, we’ll take you through a relaxed yet detailed approach to drawing big flowers. By the end of this article, you will have learned techniques that allow you to create large and bold floral designs without stressing over every detail. Whether you’re looking to create a decorative piece for your home or just want a relaxing, artistic activity, Big Flower Drawing Easy are a fantastic way to unleash your creativity.
Why Big Flower Drawing Easy Are So Appealing
There’s something inherently striking about a large flower. Big flowers can bring a dramatic and impactful presence to any drawing. When compared to small or intricate floral designs, larger flowers tend to dominate the page, creating a bold and captivating focal point. This size allows for more freedom in your creative process—no need to worry too much about precise, tiny details.
One of the best aspects of Big Flower Drawing Easy is their versatility. They can range from realistic representations to more abstract designs. With simple steps and a little practice, anyone can master the art of big flower drawing.
For those who are just starting, it’s a great idea to focus on larger shapes and outlines. Simplifying the flower into basic shapes will give you a clearer sense of how to approach the larger structure before you dive into adding smaller details. This method reduces any overwhelming feelings and helps build confidence, making it easier to enjoy the process.
Tools You Need to Start Your Big Flower Drawing Easy
Before diving into your drawing, it’s important to gather the right materials. While you don’t need anything extravagant, having the proper tools at hand can make the experience much more enjoyable. For a big flower drawing easy process, these basic tools will do:
- Pencil: Start with a good-quality pencil. A standard 2B or HB pencil is ideal for sketching your initial outline. Avoid using overly soft pencils as they might smudge.
- Paper: Choose a clean sheet of drawing paper. You don’t need heavy-duty, expensive paper for a simple flower sketch, but it should be thick enough to handle erasing and shading.
- Eraser: A good eraser, preferably a kneaded one, will allow you to make corrections without leaving behind visible marks. It’s crucial to have an eraser to refine your work as you go along.
- Colored Pencils or Markers (Optional): Once your basic sketch is complete, you can add a splash of color to your Big Flower Drawing Easy to enhance its beauty. Colored pencils, watercolors, or markers will all give your flower drawing its finishing touch.
Now that you’ve gathered your tools, let’s dive into the fun part—drawing!
Step-by-Step Guide to Drawing Big Flowers Easily
Big Flower Drawing Easy doesn’t have to be complicated, and in this section, we’ll break it down into simple steps to guide you. Following a process will allow you to focus on getting the shapes right and creating a natural flow to your work. Here’s how to approach it:
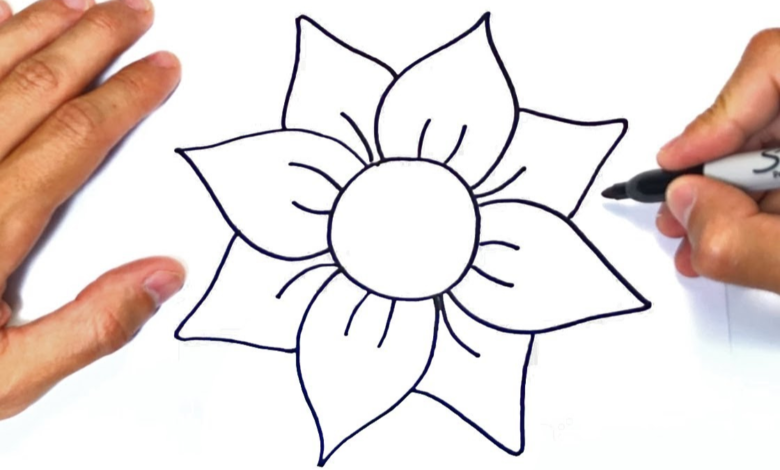
Start with the Central Petal
A big flower typically has a central focal point—often the large, most prominent petal. Start by drawing a large circle or an oval in the center of your page. This will be the base of your flower’s bloom. From here, you’ll begin to add the first petal that leads the eye outward. By starting with the largest shape, you’ll give yourself a structure to work around, making the rest of the drawing easier to fill in.
Make sure this first petal is smooth and even, as it will be the anchor of your design. Don’t worry about making it perfect; the goal is to create a basic outline that can be adjusted later.
Draw Additional Petals Around the Center
Once the central petal is in place, start adding more petals around it. These petals should gradually get smaller as they move outward from the center. Don’t stress about perfect symmetry; flowers in nature aren’t perfectly symmetrical, and neither should your drawing be. Allow the petals to vary slightly in shape, size, and orientation to mimic the organic beauty of real flowers.
The petals should gently overlap one another, creating a natural flow that feels dynamic and balanced. If you’re unsure about the placement of each petal, feel free to use light, sketchy lines first. This allows you to reposition and tweak until you find the ideal arrangement.
Define the Flower’s Stem and Leaves
The next step is to sketch the flower’s stem and leaves. A big flower drawing easy process means avoiding overly complicated details at this stage. The stem should be simple—draw two curved lines extending down from the base of the flower. These lines can gradually get thicker as they approach the ground.
For the leaves, sketch two to four large leaves around the base of the flower. Leaves typically have an elongated, oval shape with pointed tips. To make your drawing look more realistic, add veins in the leaves. These can be drawn with light pencil lines, giving the drawing more texture and depth.
Add Details to the Petals and Leaves
Once the basic shapes of your flower and leaves are in place, it’s time to add some details. This can be one of the most enjoyable parts of the drawing process because you can get creative with how much detail you want to include.
For the petals, consider adding gentle curves to create a more natural, flowing effect. Add slight notches at the tips or along the edges of the petals for variation. You can also enhance the shading to make the flower look more three-dimensional. Lightly shade the areas of the petals that would be in shadow, such as the base or the areas overlapping with other petals.
For the leaves, add texture by drawing subtle vein lines and shading them in a way that creates depth. This can make the leaves look more lifelike and enhance the overall appearance of the flower.
Tips for Making Your Big Flower Drawing Look Even Better
While drawing a big flower is a fun and creative activity, a few additional tips can elevate your final result and bring your artwork to life. Here are some ways you can make your drawing stand out:
- Use Light and Shadow: Adding shading to your Big Flower Drawing Easy can create depth and make it feel more three-dimensional. Consider where your light source is coming from and shade accordingly, making areas opposite the light source darker.
- Experiment with Colors: While a simple pencil sketch is great, coloring your flower can add vibrancy and excitement. Use colored pencils, markers, or even watercolor to bring your flower to life.
- Vary the Petals: Not all petals need to be the same. Consider adding slight variations in the shape, curvature, or overlap to give the drawing a more natural feel.
- Work with Different Flower Types: While the sunflower is a common choice for Big Flower Drawing Easy don’t hesitate to experiment with other flowers, such as daisies, poppies, or roses. Each flower has its unique petal shapes, colors, and arrangements, which can add variety to your drawing.
Conclusion: The Joy of Drawing Big Flowers
Creating a Big Flower Drawing Easy is all about enjoying the process and embracing your creativity. By breaking the steps down into manageable chunks, anyone can create stunning floral art. The beauty of a flower lies in its simplicity and natural elegance, and that’s something you can easily capture with just a few lines and shapes.
Whether you’re an artist looking to hone your skills or a beginner trying something new, drawing big flowers is a satisfying and rewarding experience. With practice, you’ll develop your style and techniques, making each drawing even more beautiful than the last.